
zabbix监控之agent
上一章安装好了zabbix server端,现在来配置slave端,用server端来监控。(zabbix1为server端,zabbiz2和zabbix3为slave端)
1. 将zabbix1上的zabbix源scp到zabbix2,zabbix3.
[root@zabbix1 yum.repos.d]# scp CentOS-Base.repo zabbix-agent2-plugins.repo zabbix.repo zabbix2:/etc/yum.repos.d/
root@zabbix2's password:
CentOS-Base.repo 100% 2495 4.3MB/s 00:00
zabbix-agent2-plugins.repo 100% 240 474.6KB/s 00:00

[root@zabbix1 yum.repos.d]# scp CentOS-Base.repo zabbix-agent2-plugins.repo zabbix.repo zabbix3:/etc/yum.repos.d/
root@zabbix2's password:
CentOS-Base.repo 100% 2495 4.3MB/s 00:00
zabbix-agent2-plugins.repo 100% 240 474.6KB/s 00:00
2. 在zabbix2和zabbix3下载zabbix-agent.
[root@zabbix2 ~]# yum install zabbix-agent -y
Updating Subscription Management repositories.
Unable to read consumer identity
This system is not registered to Red Hat Subscription Management. You can use subscription-manager to register.
Repository AppStream is listed more than once in the configuration
CentOS-8.5.2111 - Base - mirrors.aliyun.com 7.6 kB/s | 3.9 kB 00:00
CentOS-8.5.2111 - Extras - mirrors.aliyun.com 9.3 kB/s | 1.5 kB 00:00
CentOS-8.5.2111 - AppStream - mirrors.aliyun.com 22 kB/s | 4.3 kB 00:00
Zabbix Official Repository (Agent2 Plugins) - x86_64 8.5 kB/s | 2.9 kB 00:00
Dependencies resolved.
=====================================================================================================================================================================================
Package Architecture Version
3. 修改zabbix-agent配置文件/etc/zabbix/zabbix_agentd.conf,设置开机自启。
[root@zabbix2 ~]# vim /etc/zabbix/zabbix_agentd.conf
......
117 Server=192.168.2.10
171 ServerActive=192.168.2.10
182 Hostname=zabbix1
......
[root@zabbix2 ~]# systemctl enable --now zabbix-agent.service
Created symlink /etc/systemd/system/multi-user.target.wants/zabbix-agent.service → /usr/lib/systemd/system/zabbix-agent.service.
4. 在zabbix server端zabbix1上设置以监控zabbix2和zabbix3.
4.1 创建主机设置主机名称,模板,群组,IP等信息。

4.2 查看被监控的主机zabbix2.(需要等一会,等ZBX变成绿色说明监控成功)
4.3 这时候查看图形监控的时候会发现中文乱码的问题。

4.4 解决方法
4.4.1 在window中C盘搜索simkai.ttf字体文件,找到后上传到zabbix1的/usr/share/zabbix/assets/fonts下。
[root@zabbix1 fonts]# pwd
/usr/share/zabbix/assets/fonts
[root@zabbix1 fonts]# ls
simkai.ttf
4.4.2 修改文件/usr/share/zabbix/include/defines.inc.php将文件中的graphfont修改为simkai。
[root@zabbix1 fonts]# vim /usr/share/zabbix/include/defines.inc.php
88 define(‘ZBX_GRAPH_FONT_NAME’, ‘simkai’); // font file name
4.5 再次查看图形监控,中文乱码问题就ok了。

如果在生产环境中,比如我们要建立数据中心,来监控一整个机房的主机,总不能一台一台添加吧?所以呢我们要设置主机网段,让zabbix server来自动发现添加。
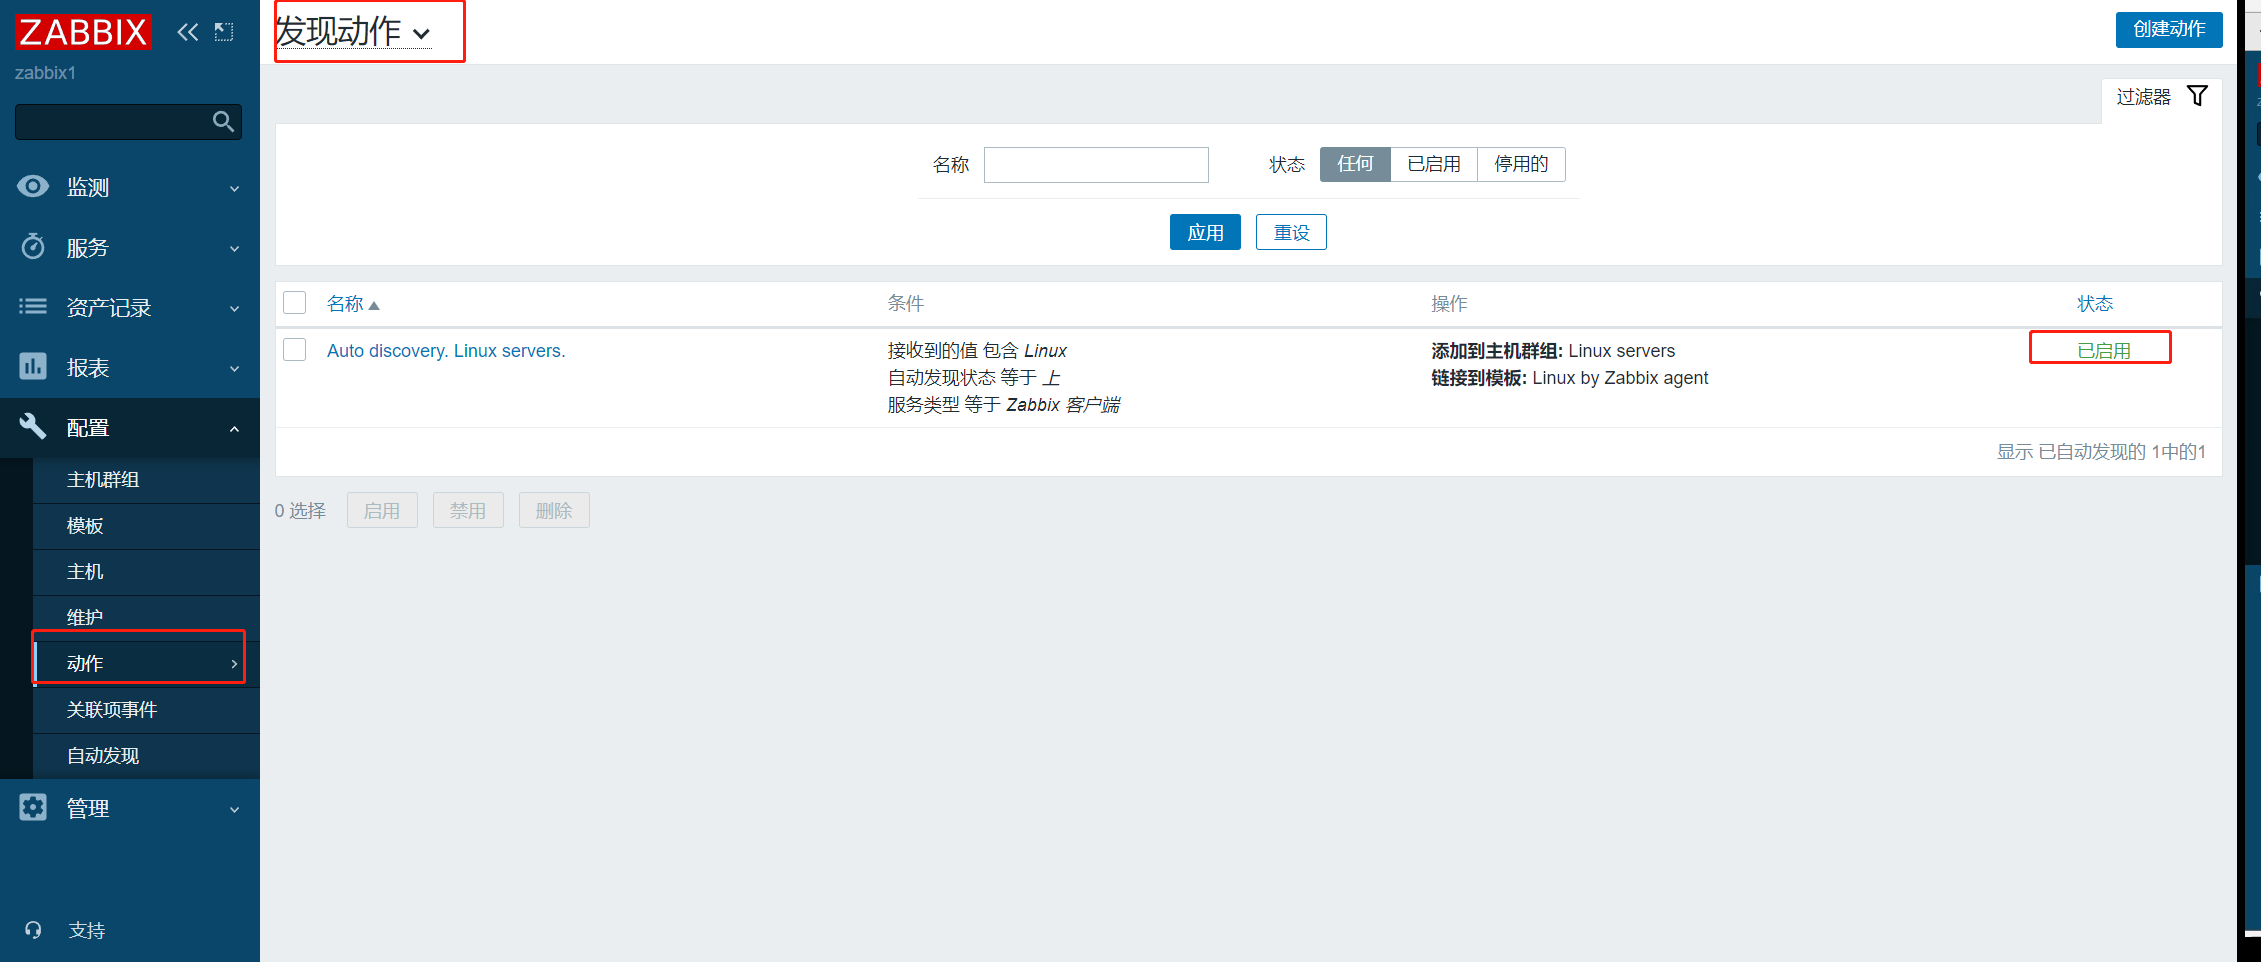
1 . 启用动作
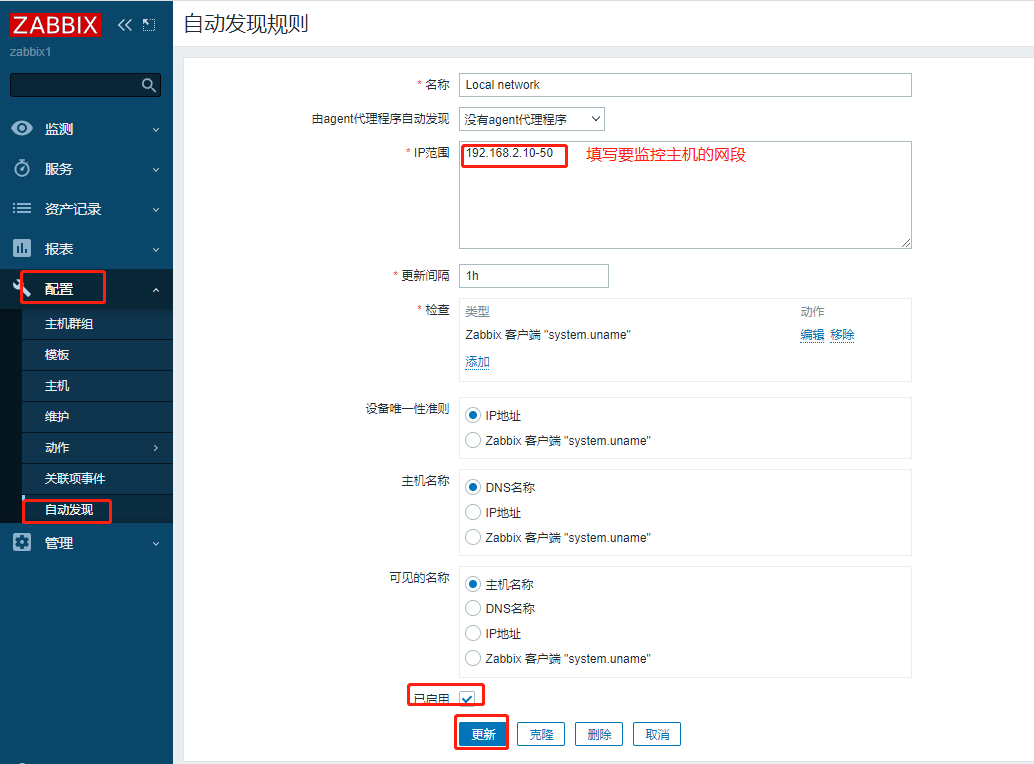
2. 设置网段让其自动发现添加网段内的主机。
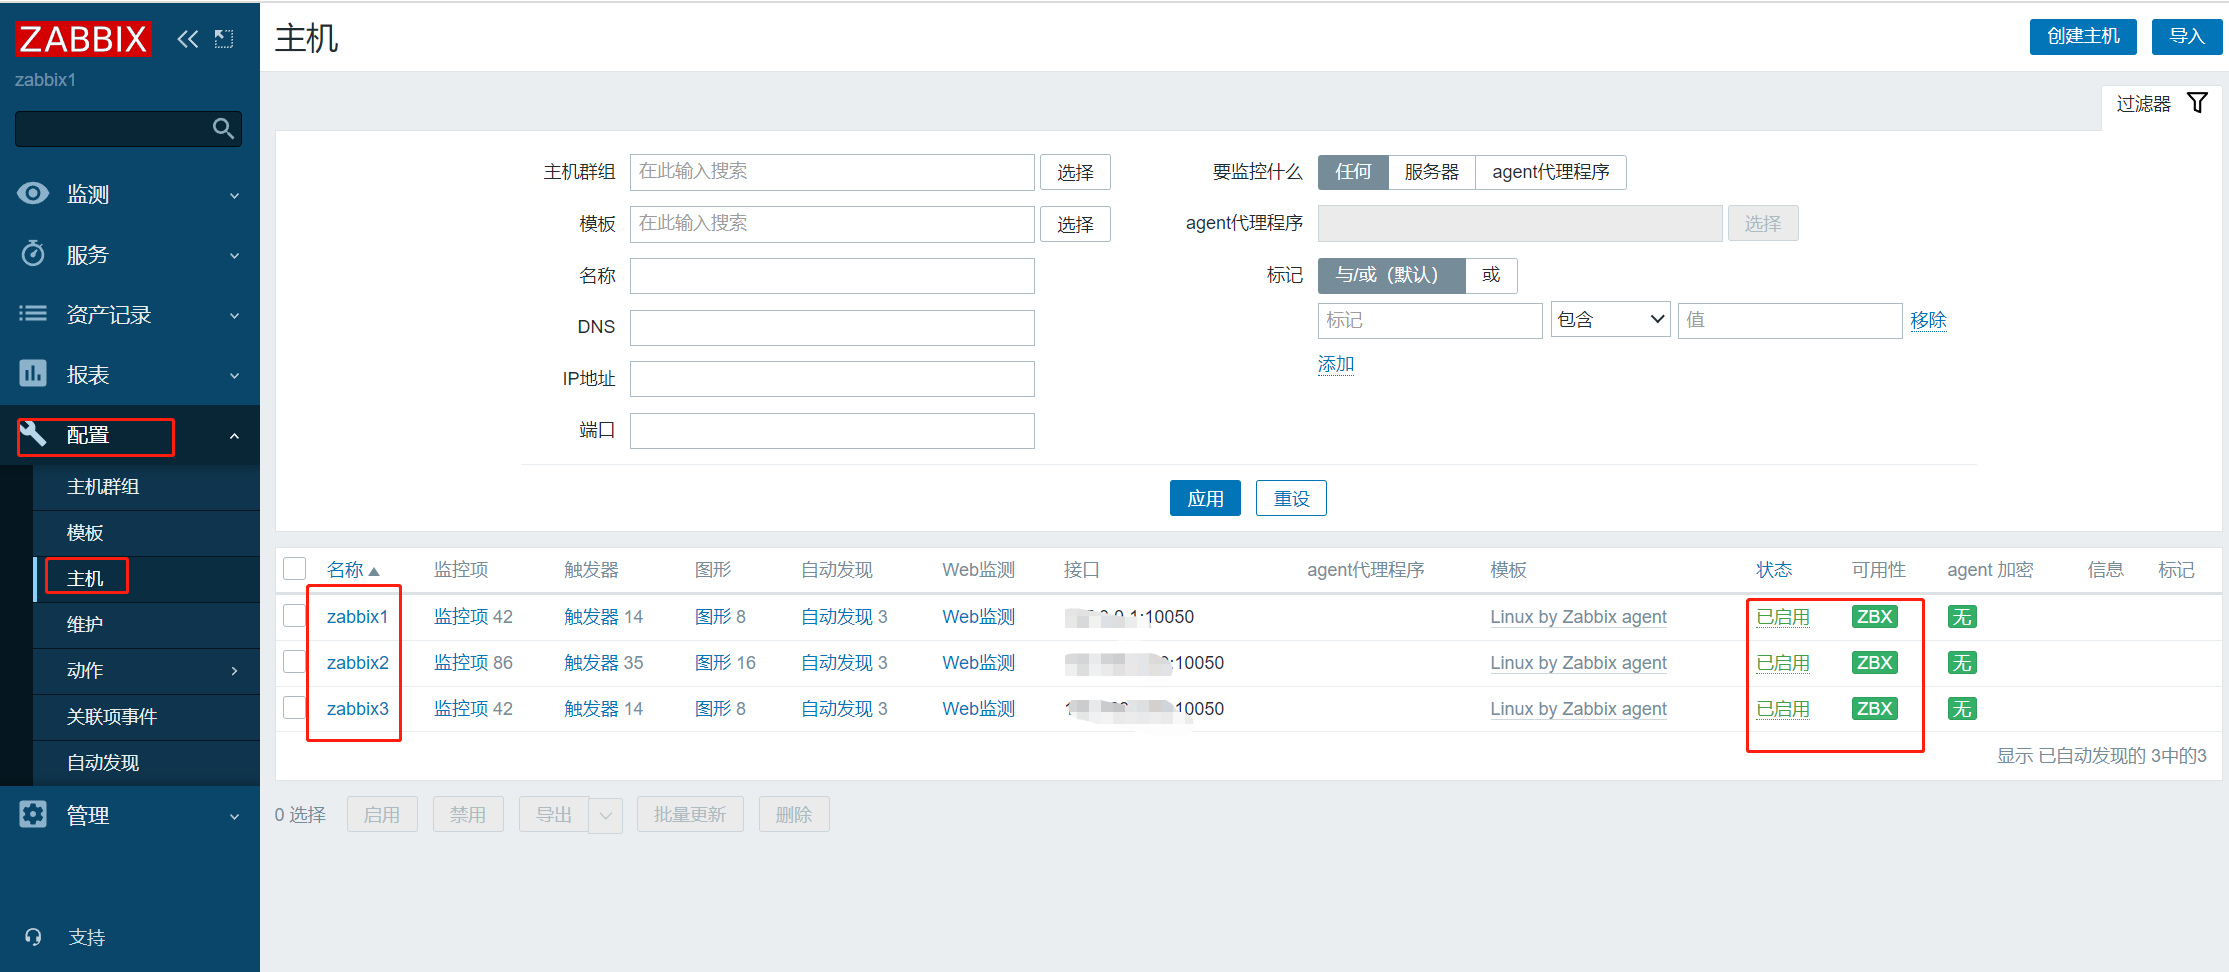
3. 这样在网段内的主机就自动添加到了监控中。
除了设置网段来自动添加,还可以设置主机名来自动添加。
1 . 先把刚才网段添加的主机删了,重新设置主机名来添加。

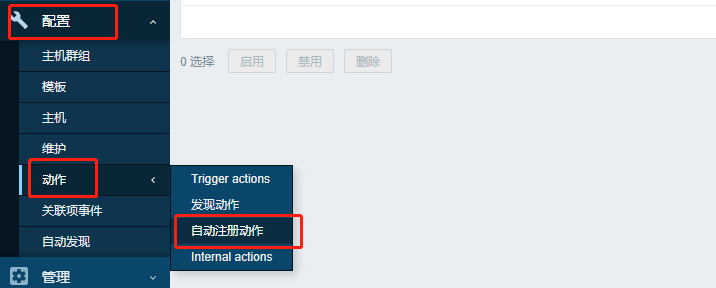
2. 设置自动注册动作
2.1 具体设置

2.2 创建动作,设置想让自动发现的主机名,动作名称随意。

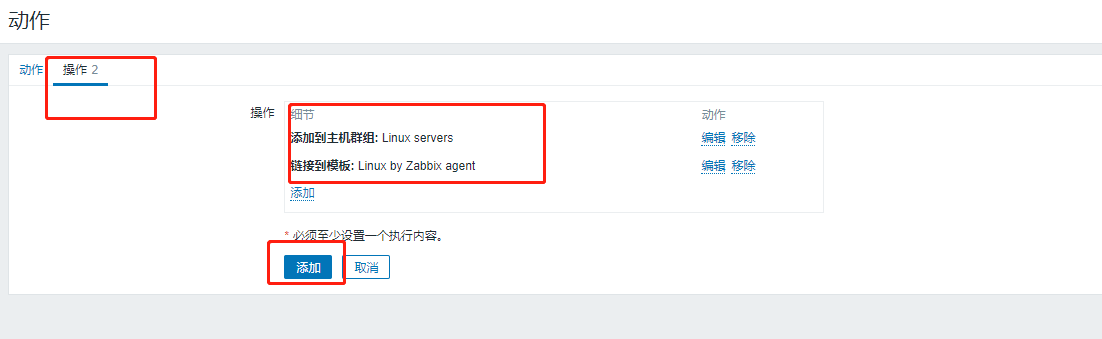
2.3 设置操作,要用那个模板,要添加到那个主机群组,完成之后点击添加。

3. 然后在主机界面查看已经自动添加成功。


